Configuring and Using the FRITZ!Box Answering Machine
You can use the FRITZ!Box as an answering machine without connecting any additional devices. If you have more than one telephone number, you can set up multiple answering machines (up to 5).
Answering Machine Functions
- Voice to mail: If desired, you can receive new messages automatically by e-mail.
- Schedule: For individual days of the week you can specify the times at which the answering machine is switched on.
- Remote playback: You can check the answering machine from on the go.
Requirements
- For each answering machine to be set up, there must be at least one telephone number that is not assigned to any other answering machine.
Example
You have two telephones with different telephone numbers: One telephone for personal calls and one telephone for business calls. Then you can configure a separate answering machine for each telephone: Assign your personal telephone number to the first answering machine and your office number to the second one.
Instructions: Configuring the first answering machine
- Select "Telephony / Answering Machines".
- Click the "Settings" button.
- Enter a name.
- Specify which calls the answering machine should accept.
Enable the "all incoming calls" option or select a telephone number. You can also select multiple telephone numbers.
All of the telephone numbers configured under "Telephony / Own Telephone Numbers" are available.
- Specify the mode, greeting delay and recording length.
Setting Function "Greeting only" Operating Mode Callers hear a greeting.
"Record messages" Operating Mode Callers hear a recording and can leave messages.
Greeting delay How long the telephone will ring before the answering machine accepts a call.
Recording length How long a caller has to leave a message.
- Click "Additional Settings".
- Enable any of the following functions you would like to use:
- receive new messages by e-mail
- remote playback
- time control
For more information, see the Help on the answering machine settings.
- Click "OK".
Instructions: Adding another answering machine
Once the first answering machine has been configured, you can add additional answering machines.
Adding an Answering Machine
- Select "Telephony / Answering Machines".
- Click the "Another Answering Machine" button:
- Define the operating mode:
Operating Mode Function Recording Messages Callers can leave messages.
Greeting only The answering machine does not record any messages.
Setting Function Greeting delay How long the telephone will ring before the answering machine accepts a call. Recording length How long a caller has to leave a message. - Enter a name.
- Click "Next".
- Define which calls the answering machine accepts: Select one or more telephone numbers.
All of the telephone numbers configured under "Telephony / Own Telephone Numbers" are available, as long as they have not yet been assigned to an answering machine.
- Click "Apply".
Enabling e-Mail Sending, Remote Playback and Schedule
You enable sending messages by e-mail, remote playback and a schedule as follows:
- Select "Telephony / Answering Machines".
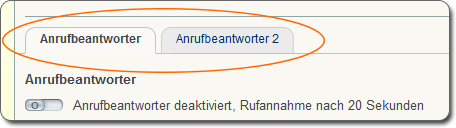
- Select the answering machine you wish to configure:
- Click the "Settings" button.
- Enable any of the following functions you would like to use:
- receive new messages by e-mail
- remote playback
- time control
For more information, see the Help on the answering machine settings.
- Click "OK".
Operating an Answering Machine
Configured answering machines can be operated at various places:
- in the FRITZ!Box user interface at "Telephony / Answering Machine"
- on all connected telephones using a voice menu
- on FRITZ!Fon cordless telephones in the menu on the display