Connecting a door intercom system
If your door intercom system has an a/b interface, you can connect the door intercom system to the FRITZ!Box. Then you can use the telephone to receive visitors and open the door.
Requirements
The door intercom system must have the following properties:
- a/b interface
- When a doorbell is rung, the door intercom system dials a telephone number on the a/b interface. For this the system must use DTMF tone dialing.
Other 2-wire or 4-wire solutions, for example "Telekom 2-Draht" or "FTZ 123 D 12", are not supported.
Connecting a door intercom system
- Connect the door intercom system to the "FON" port (a/b interface) on the FRITZ!Box. More information is available in the manual of the door intercom system.
Configuring a Busy Signal and Dial Tone in the Door Intercom System
If you have to enter a busy signal and a dial tone in the door intercom system, enter the following values:
- Busy signal: 500 ms tone, 500 ms pause, +/- 20 ms (425 Hz +-25 Hz)
- Ring tone: 1 s tone, 4 s pause +/-100 ms
Setting up a Door Intercom System in the FRITZ!Box
- Select "Telephony / Telephony Devices" in the FRITZ!Box user interface.
- Click "Configure New Device".
- Select "Door intercom system with a/b interface".
- Click "Next".
- Select the port to which the door intercom system is connected.
- Click "Next".
- In the "Extension number" fields, enter the numbers of the extensions set for the individual doorbells in the door intercom system.
You can configure up to 4 doorbells.
If an incorrect extension number is entered in the FRITZ!Box, the doorbell will not be routed to the telephone.
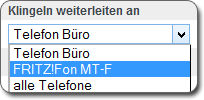
- In the "Forward doorbells to" list, select where the doorbell should be routed:
- You can select one telephone.
- You can select "all telephones" (broadcast call).
- You can select "Telephone number" and enter a one telephone number. This can be an external telephone number like your mobile telephone number, or an internal number.
Individual internal numbers are entered with **, for instance **1 or **610.
If you enter more than one internal number, enter ** before the first number, and then # before all other numbers, for example: *1#610#621.
- Click "OK" to save the settings.
Example: Route doorbell to a DECT cordless telephone
You would like to operate the door intercom system with your DECT cordless telephone from everywhere in your home.
In the "Route doorbells to" list, select your DECT cordless telephone:
Example: Route doorbell to smartphone
You would like to operate the door intercom system using your smartphone, not only within your home, but also from the garden or from on the go.
In the "Route doorbells to" list, select the "Telephone number" option and then enter your mobile telephone number:

Operating the Door Intercom System on a Telephone
When a visitor rings the doorbell, all telephones you assigned to the doorbell in the FRITZ!Box user interface will ring.
You can speak with the user on the telephone and open the door.
Which telephone keys and keypad combinations must be entered is explained in the manual of the door intercom system. The manufacturer can provide you with additional information.