Using Google Calendar for Automatic Switching
When you set up automatic switching for the socket of a Smart Home device from AVM, you can set up a switching schedule that receives all times for switching the socket on and off from a Google calendar.
Automatic switching can either be configured for an individual Smart Home device or for a group of multiple Smart Home devices.
Configuring the Google Calendar
You need a Google calendar that contains only the times to switch the socket on and off. For this you can set up a special calendar in your Google account.
Here is how to enter in the calendar the desired times for switching on and off: Call the appointment "ON" for switching the socket on and "OFF" for switching the socket off. The calendar entries are not case-sensitive.
Instructions: Configuring Switching for a Single Device
- Select "Home Network / Smart Home".
- Click on the "Edit" button for the desired device

- Click on the "Switch Automatically" tab.
- Enable the "Schedule enabled" checkbox and select the "Calendar" option.
- Continue with the section "Set Up Access to Google Calendar", further down on this page.
Instructions: Configuring Switching for a Group
- Select "Home Network / Smart Home".
- Click on "New Group" or open the settings of an existing group by clicking on the "Edit" button next to the group switch.
- Only for a new group: Enter a name for the group and select all devices that are to belong to the group. Click on "OK".
- Enable the checkbox "Switch group automatically" and select the "Calendar" option.
- Continue with the next section, "Set Up Access to Google Calendar".
Instructions: Configuring Access to a Google Calendar
- Enter the name of the Google calendar.
- Click on "OK" or "Apply".
A verification URL and user code are displayed:

- Click on the "Verification URL" link. Switch to the window "Enable FRITZ! Actuator Calendar".
A window appears in which you can log in to your Google account.
- Enter the email address and password and click on "Next".
The entry field for the user code appears:
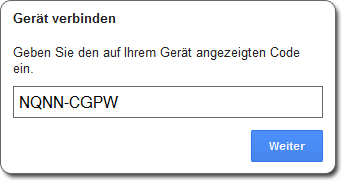
- Enter the user code from the "Enable FRITZ!Actuator Calendar" window and click on "Next" and then "Accept".
The message "Authentication for the Google calendar was successful" appears in the user interface.
Instructions: Refreshing Times to Switch On and Off
The automatic switching schedule retrieves the latest switching times from the Google calendar once every 24 hours. If needed, you can refresh the switching times before 24 hours have elapsed:
- Select "Home Network / Smart Home".
- Click on the "Edit" button next to the group switch or individual FRITZ! actuator for which the switching times are to be refreshed.
- Go to the "Automatic Switching" tab and click on the "OK" button.
The switching times are refreshed. This process may take several minutes.
Instructions: Removing connections to the Google Calendar
After disabling "Calendar" automatic switching, the connection to the Google calendar remains stored in the FRITZ!Box. Proceed as follows to delete all connections to Google calendars:
- Enable the "Schedule enabled" checkbox and select the "Calendar" option.
- Under "Calendar", click on "Remove connections from Google calendar" (only visible if connections to Google calendars are still stored).
- Click on "Reset Google Calendar".
- Confirm by clicking on "OK".