Call Diversion
Telephony / Call Handling / Call Diversion
On the "Telephony / Call Handling / Call Diversion" page you can set up call diversion for incoming calls. Call diversion settings already configured can be switched on and off, edited, or deleted. You can also configure a schedule for call diversion.
Setting Up a New Call Diversion Setting
Call diversion entails automatically diverting incoming calls to a previously specified destination. You can configure call diversion for all incoming calls or only for certain calls, for instance, only for calls from contacts in the telephone book. You can specify another telephone line or an answering machine as the destination.
Instructions: Setting Up New Call Diversion
The instructions are presented here: Setting Up New Call Diversion
Configuring a Schedule for Call Diversion
You can configure a schedule for call diversion. The schedule defines the times on each day of the week when call diversion should be switched on and off. If multiple call diversion settings are configured, you can select which call diversions should be subject to the schedule.
Instructions: Enabling Time Control
- Select "Telephony / Call Handling / Call Diversion".
- Enable the checkbox "Switch call diversion on and off by schedule".
- Mark the desired periods of time in the timetable, or enter the periods using the keyboard.
- If multiple call diversions are configured: Define call diversions should be subject to the schedule. Do this by enabling the "Scheduled" checkbox next to the desired call diversion settings.
- Click on "Apply".
Instructions: Marking Periods of Time in the Timetable
You can mark periods of time directly in the timetable:
- Click on the status you would like to define for periods.
The selected status is displayed with a blue background; here, for instance, "Call diversion enabled".
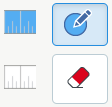
-
To mark a quarter-hour period, move the mouse cursor to the desired day of the week and time of day, and press the left mouse button.
To mark longer periods, hold the left mouse button down and move the mouse to the left, to the right, upward or downward.
Instructions: Entering Periods Using the Keyboard
You can enter periods using the keyboard:
- Select "Telephony / Call Handling / Call Diversion".
- Click below the schedule on "Enter Period".
- Select the status (call diversion enabled or switched off) for which you would like to enter a period.
- Select the desired days of the week and define the desired period.
- Click on "Add Period".
Example
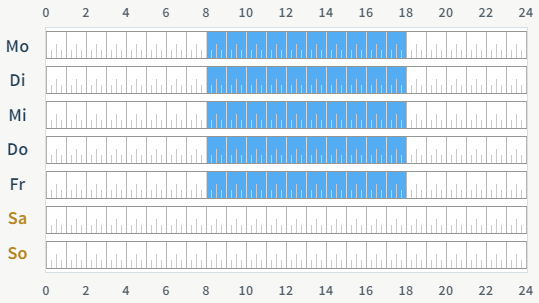
All scheduled call diversions are enabled (on) at the following times: Mo - Fr from 8:00 am - 6:00 pm
Editing and Deleting Configured Call Diversion
In the overview of call diversion settings you can switch configured call diversions on and off, edit or delete them.
Operation Controls in the Overview
| Operation Control | Use |
|---|---|
| | Call diversion is switched on. Click on the icon to switch call diversion off. |
| | Call diversion is switched off. Click on the icon to switch call diversion on. |
 | Open the call diversion settings for editing. |
| | Delete call diversion. |